
How to Update Nauti-Control Firmware (Windows)
This guide explains how to update the firmware on your Nauti-Control device using the ESP32 Flash Tool. The firmware is uploaded as a .bin file (do not unzip or repackage it).
Step 1 – Download the ESP32 Flash Tool
Download the ESP32 Flash Download Tool from Espressif using the link below:
https://www.espressif.com/en/support/download/other-tools

The flash tool is provided as a ZIP file. Once downloaded, unzip it to a location on your computer that you can easily find later.
Step 2 – Download the Firmware (.bin file)
Download the required Nauti-Control firmware from the link below. The firmware is provided as a .bin file.
https://drive.google.com/drive/folders/1xv6u8lbXd5x4-eY5j-DRU1JGPqWb8Nxd?usp=sharing
Important: Use the .bin file exactly as downloaded. Do not unzip, rename, or modify the firmware file.
Step 3 – Run the Flash Tool
Open the folder where you extracted the ESP32 Flash Tool. Locate the file named flash_download_tool_x.x.x.exe (version number may vary) and double-click it.
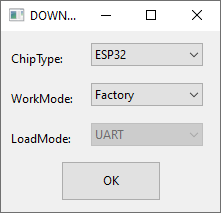
When prompted, select the following options:
- Chip Type: ESP32
- WorkMode: Factory
Click OK to continue.
Step 4 – Connect the Nauti-Control Device
Using an appropriate USB cable, connect the Nauti-Control device to a free USB port on your PC as shown below.

Windows should automatically detect the device and assign it a COM port.
Step 5 – Flash the Firmware
Once connected, the flash tool will display the main flashing screen shown below.
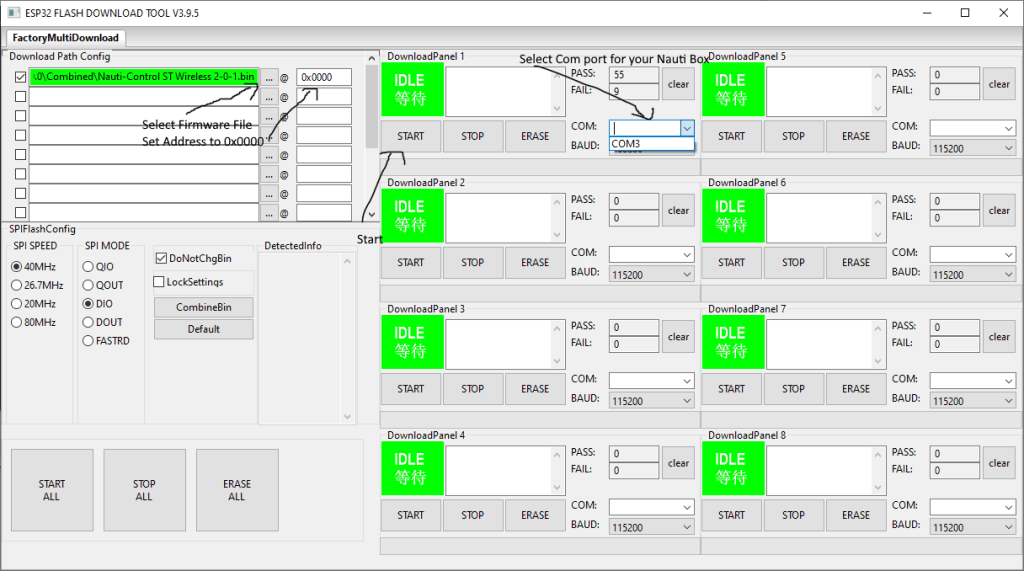
Configure the flashing options as follows:
- Select the downloaded .bin firmware file using the menu button
- Set the address to 0x0000
- Select the correct COM port for the Nauti-Control device
Click the Start button to begin flashing.
The progress bar will advance and, once complete, a Finished message will be displayed.
Firmware update complete. You can now disconnect the USB cable and power-cycle the device.