Can you change how far your Raymarine autopilot turns when it tacks? On most of
the older kit, yes — it is a calibration setting, 100° by default, adjustable
between 40° and 125°. On anything driven by a p70, including every Evolution
system, no: the angle is worked out from the wind angle you are sailing and there
is nothing to set. On the tiller pilots it is fixed.
The thing that catches people out is that it is the control head on the
pedestal that decides, not the course computer below decks. The same SPX
course computer gives you a fully adjustable angle through an ST7002, a different
menu through an ST70, and no setting at all through a p70.
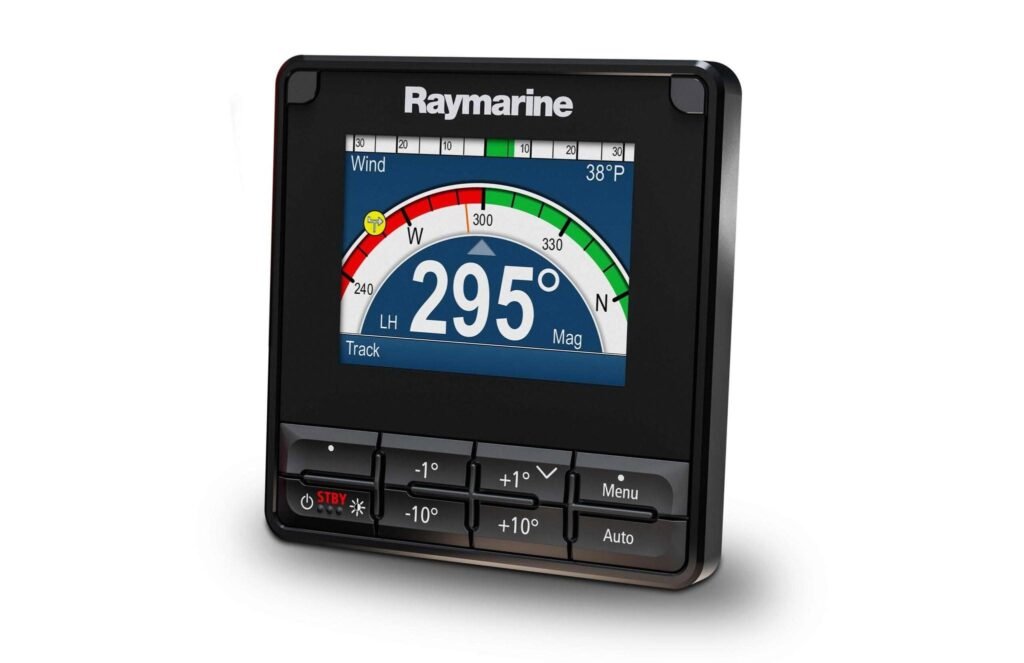
Find your control head first
Work from the unit you actually press buttons on:
- ST6001, ST6001+, ST6002, ST7001, ST7001+, ST7002 — four-button
course change keys. Adjustable, in User Calibration. - ST6000 Plus, ST7000 Plus, ST600R — the earlier Type 100/300
generation. Adjustable, but in different menus from each other,
and only with new enough course computer software. - ST3000, ST6000 and ST7000 without the “Plus” —
fixed at 100°. - ST8001, ST8002 — rotary knob instead of those keys.
Setting present but does nothing. - ST70 pilot head — colour menu-driven display.
Adjustable. - ST70+ — a different product from the ST70. No angle
setting. - p70, p70s, p70R, p70Rs — not adjustable,
whatever it is plugged into. - ST4000+, ST5000+ — self-contained, head and calibration in one
unit. Adjustable, but well hidden. - ST4000 (non-Plus), ST1000, ST1000+, ST2000, ST2000+, S1000+,
S2000+ — fixed at 100°. No setting anywhere. - RayPilot 650, and the ST5000 without the
“Plus” — no AutoTack at all.
Below decks you might have an S1, S1G, S2, S2G, S3 or S3G SmartPilot, an SPX-5,
SPX-10 or SPX-30, or on older installations a Type 100, Type 150, Type 300 or Type
400. Those Type units are course computers, not control heads —
easy to misread, and not to be confused with the Type 1, Type 2 and Type 3
drives, which are the rams and pumps that actually move the rudder. None of
them has a menu of its own.
For the tack angle it makes little practical difference which computer you have:
the range, the step size, the default and the sail-boat gating are the same across
all of them. Raymarine’s own commissioning guides split their settings tables by
course computer wherever a genuine difference exists — drive type, rudder
alignment, response range — and the AutoTack row is never split.
The G (gyro) variants make no difference to AutoTack either.
They change the response range and the AutoLearn behaviour, not the tack.
There is one real exception, on the oldest kit. With a Type 100 or Type
300 course computer the software version genuinely does matter — the
feature needs version 11 or later. That is covered in its own
section below.
Before you start: check the vessel type
On every SmartPilot and SPX system, the AutoTack angle is gated behind the vessel
type: it is only available when the vessel type is set to SAIL BOAT. If your pilot
was commissioned as a motor vessel, the
AUTO TACK page will not appear at all, and no amount of scrolling
will find it. That is the first thing to check if the setting seems to be missing.
On the older Type-computer installations the gating is worded slightly
differently — the ST6001+ and ST7001+ manuals say the page appears only if vessel
type is SAIL BOAT on a Type 150 or Type 400, or
DISPLACEMENT on a Type 100 or Type 300.
SmartPilot and SPX, through an ST6001, ST6002, ST7001 or ST7002
This is the classic four-button controller, and the AutoTack angle is the
first page of User Calibration.
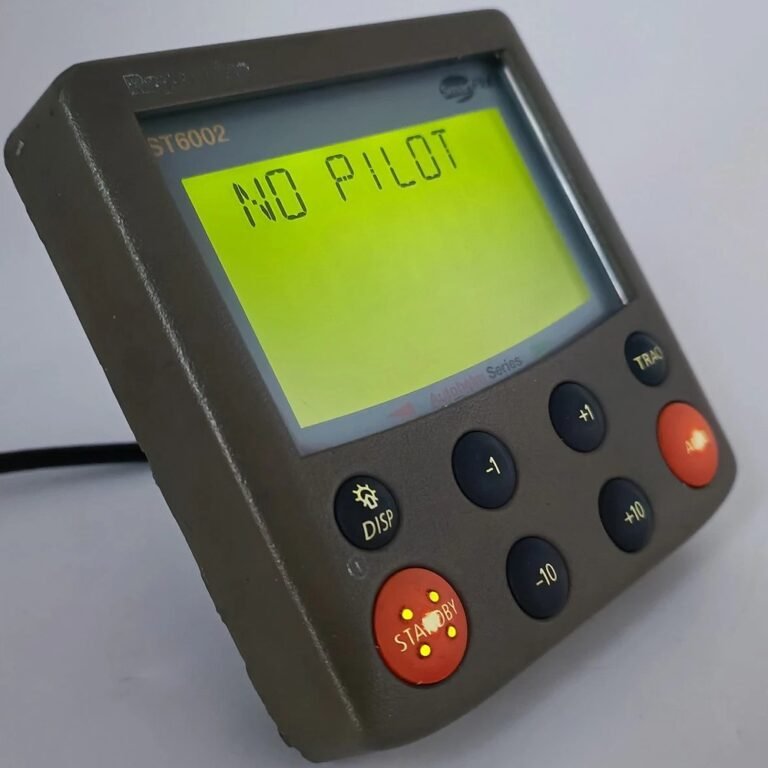 An ST6002. The four course-change keys are -1, +1, -10 and +10, with disp bottom left and standby and auto in orange — every step below uses those. This one reads NO PILOT: the head is powered but cannot see a course computer, so there is no calibration to get into.
- Get into Standby. User Calibration can only be reached from
Standby. - Press and hold standby for 2 seconds. The
display changes to DISPLAY CAL. - Press disp once. The display now reads
USER CAL. - Press auto. You are in User Calibration, and
the first page is AUTO TACK. - Set the angle. Use -1 and +1
for single degrees, -10 and +10 for ten at a
time. The range is 40° to 125° in 1° steps. - Save and exit. Press and hold standby for 2
seconds.
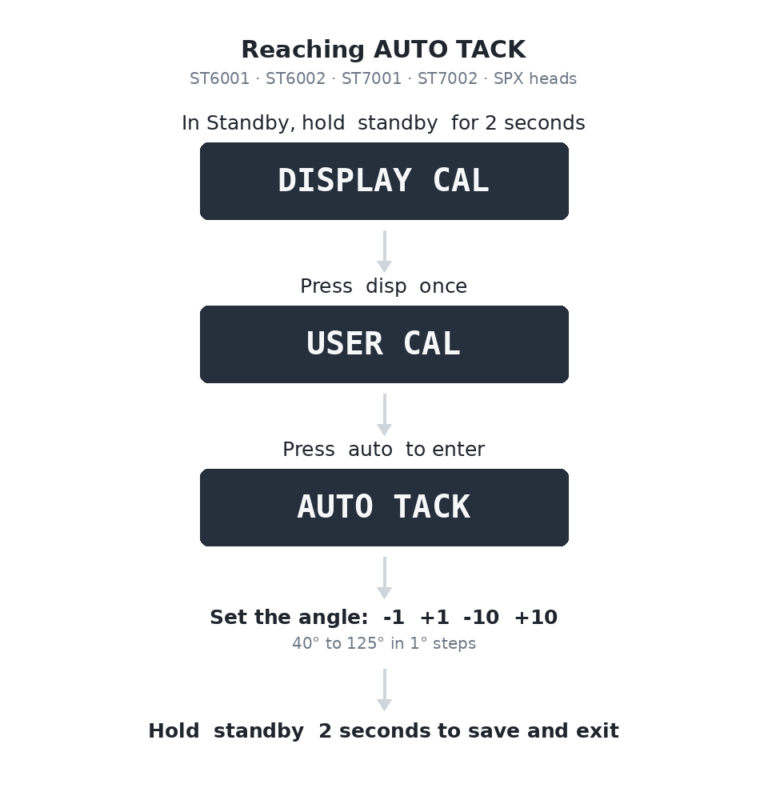
Use disp to scroll on to the other pages — GYBE
STOP, WIND TYPE, WIND TRIM and
RESPONSE sit alongside it. Hold disp for a second
to step back to the previous page.
Those same five settings also appear in Dealer Calibration, so if User Cal has
been locked out you can still reach them that way.
What number should you actually set?
The rule is simple, and it explains where the 100° default comes from:
- If the pilot has wind data, set the AutoTack angle to the
change of heading you actually want. Tacking through 90°? Set 90°. - If the pilot has no wind data, set it
20° greater than the change of heading you want. Raymarine’s own
worked example: to tack through 80° — which is what you get sailing at 40° to the
wind — set the AutoTack angle to 100°.
So 100° is the factory setting for a boat with no wind data tacking through
80°. Not arbitrary, just an assumption about a typical cruising yacht.
Relative tack
Wind the value down with -1 and -10 until it
reaches 30° and it stops being a fixed angle: the display shows
rEL and the pilot switches to relative tack. It then mirrors whatever apparent
wind angle you are on when you trigger the tack, instead of turning through a set
number of degrees — usually a better match to how you are actually sailing.
It is an SPX-era feature. rEL is not mentioned in the S1, S2 or
S3 books, so do not assume an S-series computer has it.
ST8001 and ST8002: the setting is there but does nothing
Raymarine’s operating guides for both heads (documents 81217-1 and 81271-1)
state that the AutoTack angle and the gybe inhibit have no effect on ST8001 or
ST8002 systems. Changing the number will not change what the boat does.
These heads also have no AutoTack key combination, because they have no course
change keys. Raymarine’s commissioning guide lists the difference: the ST6001,
ST6002, ST7001 and ST7002 have “+1, -1, +10 & -10 course change keys”, while the
ST8001 and ST8002 have a “rotary course change control”. The knob doubles as Power
Steer, acting as a mini-helm.
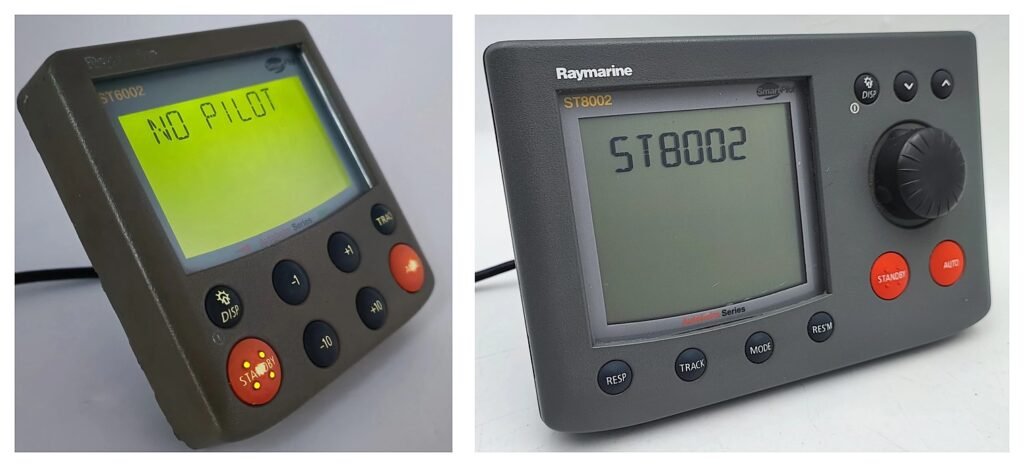
The rest of the sailing features work. Wind Vane mode is available — the ST8001
has a dedicated wv key, the ST8002 uses standby +
auto — and WIND TYPE and WIND TRIM
behave normally. Only AutoTack and gybe inhibit are affected.
The same split runs through the current range: the p70s has the course change
keys, the p70Rs has a rotary control and Power Steer.
One practical difference: values on these heads are changed with the
rotary control rather than the -1/+1 keys.
ST6000 Plus, ST7000 Plus and ST600R — the Type 100/300 generation
Two things to get straight first.
The “Plus” is doing a lot of work. An ST7000 Plus has an
adjustable angle. A plain ST7000 does not. Same for the ST6000.
The course computer’s software version matters here. This is the
one place where the head alone does not decide it. On an ST7000 Plus, AutoTack works
only with a Type 100/300 course computer running software version 11 or later, and
the AUTO TACK screen only appears when that is the case. If the
screen is missing, the course computer’s software is the first thing to check.
ST7000 Plus
Unusually, the angle is in User Setup here, not Dealer Setup —
the opposite of the ST6000 Plus. It is the tenth of eleven screens, after
POPUP TIMEOUT.
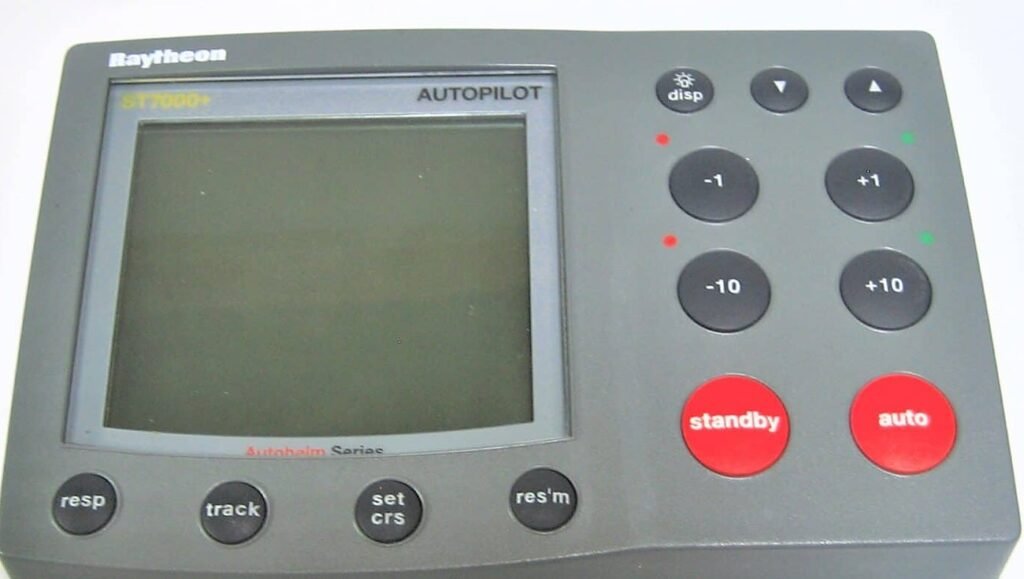 An ST7000 Plus. Note the ▼ and ▲ keys along the top, beside disp — those are what you change the AutoTack value with on this head, not the -1 and +1 keys below them. The ST6000 Plus has no such pair, which is why the two units are operated differently.
- From Standby, hold standby for 2 seconds →
SETUP. - Press disp to step forward through the
screens; hold disp for a second to step back. - Change the value with the ▼ and ▲
keys — not the ±1/±10 keys. - Hold standby for 2 seconds to exit. Note that
on this unit setup options are always saved on exit — there is no
back-out-without-saving.
The default is 100°. The handbook does not state a range or step
size for the ST7000 Plus, so we are not going to quote one — the 40°–125° figures
below come from the ST6000 Plus and ST600R books, and may or may not apply.
ST6000 Plus
Here the angle is in Dealer Setup, and getting in is the long
press again:
- From Standby, hold standby for 14 seconds →
CAL? - Press -1 and +1 together →
PILOT CAL. - Press disp to cycle the screens.
- Change with -1 and +1 — note
this differs from the ST7000 Plus, which uses the arrow keys. - Hold standby to exit and save. The ST6000 Plus
handbook says 1 second; the ST600R handbook says 2 seconds for the same menu. Hold
it for two and you have covered both.
The handbook calls it Tack angle and gives
range 40 to 125 degrees, default 100 degrees. The 1° step size is
stated in the ST600R handbook rather than the ST6000 Plus one.
Useful detail: the calibration lock on this unit gates User and Intermediate
Setup but not Dealer Setup — so the tack angle stays reachable even
on a locked pilot.
There is no gybe inhibit on this generation. The word does not appear in any of
these handbooks.
The non-Plus ST6000 and ST7000
No adjustment. Both have a built-in AutoTack that turns the vessel through 100°,
in compass and vane modes, and no tack angle appears anywhere in the calibration
list.
Their calibration menu is worth knowing because the entry is completely different
from every other pilot here — no standby hold at all:
- Press standby.
- Hold track and display together for 2
seconds — then do it again to actually enter calibration. - Step with display, and change values with the
response buttons. - Hold track and display together for 2
seconds to exit and save. A momentary press of
standby quits and discards your changes — the opposite of
the Plus units, where everything is saved on exit.
ST3000
Fixed at 100°, in Auto and Wind modes, and there is no
calibration level for it. The ST3000 uses numbered levels and only six exist:
1 rudder gain (default 5), 5 average cruise speed
(8), 6 off course alarm angle (20), 9 local
magnetic variation (off), 10 northerly turning error correction
(off) and 11 latitude (0). Levels 2, 3, 4, 7 and 8 do not exist,
and level 11 is skipped if level 10 is zero.
- Hold standby for 5 seconds →
CAL, then hold it 5 seconds again within 10
seconds to enter. - Press auto to step — the ST3000 has no
disp key. - Change with -1 and +1.
- Hold standby for 1 second to save. A momentary
press exits without changing anything.
If you get CAL OFF, calibration is locked: hold
-1 and standby together for 10 seconds, toggle with
-1 and +1, then hold the same pair for 10 seconds
to store.
SmartPilot and SPX, through an ST70 pilot head
The ST70 is menu-driven rather than a four-button head, so the setting is a menu
item instead of a calibration page:
Menu > Autopilot Calibration > Vessel Settings > Sailboat
Settings > Auto Tack Angle
- Press Menu, then use
< and > to scroll and
Enter to go down a level. - Change the value with < and
>. - Press Enter to accept, or
Cancel to back out without changing anything.
The range is the familiar 40° to 125° and the sail-boat default
is 100°. If you have seen 90° quoted for the ST70, that is the
factory default for a non-sailing vessel type; the manual lists both in different
places, which has confused a fair few people. On a boat commissioned as a sail boat,
100° is the number.
Note there is no Set-up level in that path — the ST70 goes
straight from Menu to Autopilot Calibration, unlike the p70. There is also no
relative tack on an ST70: rEL does not appear in its manuals. What
it does say is that in Wind Vane mode the tack will match the apparent wind angle
anyway.
One thing to know: Autopilot Calibration and Sailboat
Settings only appear on an ST70 when it is connected to a compatible
course computer. If those menus are missing, the head is not seeing the pilot.
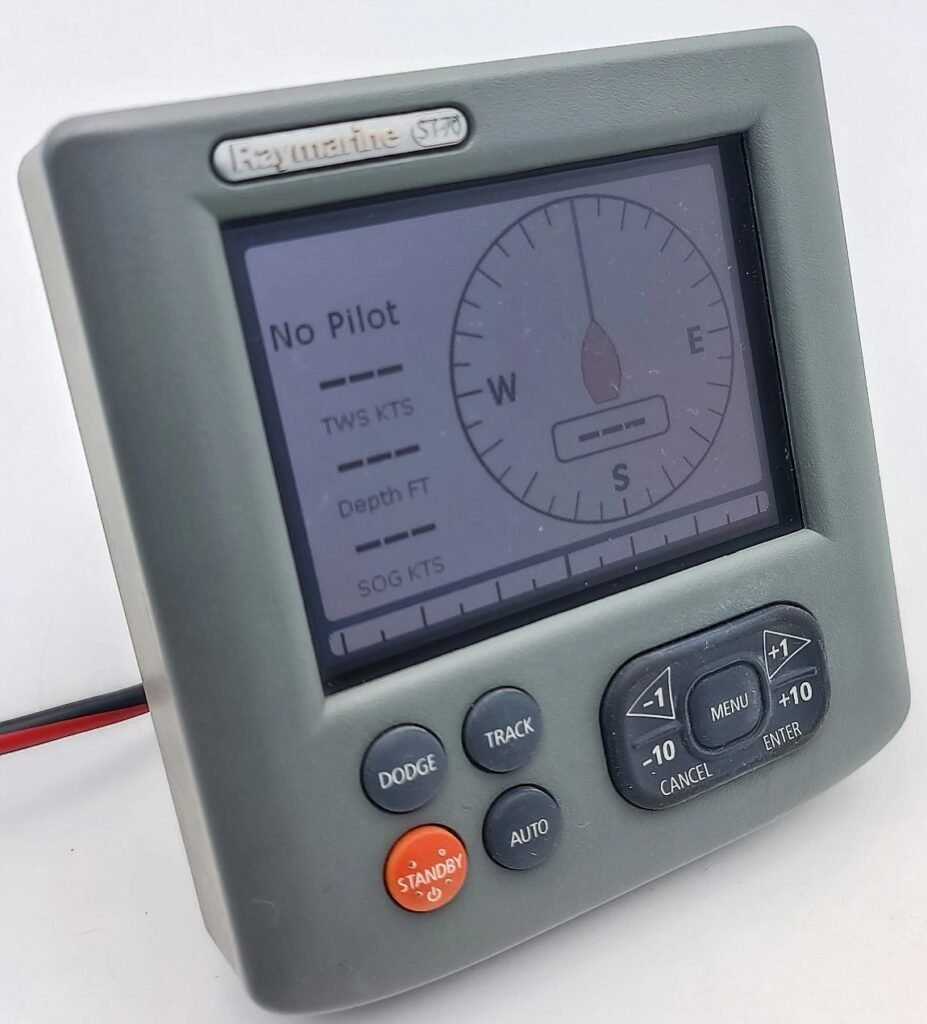 An ST70 pilot head reading No Pilot — exactly the state described above. With no course computer on the bus, there is no Autopilot Calibration menu to go into and no tack angle to set. Get the pilot talking to the head first.
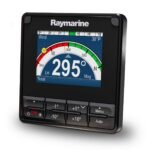
The ST70+ is not the same thing
Easy to assume the ST70+ is just a newer ST70. It is not — it is an instrument
display, and its Sailboat settings menu offers only AutoTack delay,
Gybe inhibit, Wind trim response and
Wind type. There is no Auto Tack Angle on it. Its own quick
reference card points you elsewhere: the 100° default is changed in User
Calibration — the SmartPilot’s own, reached from one of the four-button heads above,
not from the ST70+.
Note AutoTack delay is a separate setting — how long the pilot
waits before starting the turn, so you have time to get to the winches. It is not
the angle.
p70, p70s, p70R and p70Rs: no adjustable angle
On any of the p70 heads the AutoTack angle is not a setting — not on an Evolution
pilot, and not on an older SPX or SeaTalk SmartPilot either. Raymarine’s p70 manual
covers both under one heading: AutoTack is always relative to the wind angle and is
not adjustable. The pilot tacks onto the mirror image of the apparent wind angle you
were sailing.
The menu bears that out. The p70’s Sail boat settings are:
- Gybe Inhibit — Prevent Gybe means the pilot
will only turn up through the wind, so a mis-pressed button cannot round you into an
accidental gybe. Allow Gybe lets it turn either way. - Wind Type — whether Wind Vane mode steers to apparent or true
wind. - Wind Trim Response — how hard the pilot chases a shift. SPX and
SeaTalk SmartPilots only; it is not available on Evolution. - Wind Shift Alarm — on by default.
There is no Auto Tack Angle among them. On a SeaTalk system those same items
appear under User Settings rather than Sail Boat Settings, but the
list is the same.
So fitting a p70 to an older SPX or SmartPilot means losing the adjustable tack
angle that the original head had. The ST70, the p70’s direct predecessor, carried
Auto Tack Angle in this same menu.
All of these settings need wind data on the network. Without it you cannot enter
Wind Vane mode at all, so there is no AutoTack to perform — the pilot does not fall
back to a fixed angle.
Auto Turn
Auto Turn is a separate setting with its own angle: default
90°, adjustable 10° to 125°. It is triggered by
the same two-key press as an AutoTack, and which one you get depends on the mode:
- Wind Vane mode — an AutoTack, mirroring the wind angle, not
adjustable. - Auto (compass) mode — an Auto Turn, through the Auto Turn
angle.
It is set from a connected chartplotter rather than from the p70 itself, under
Drive Settings > Auto Turn. Gybe Inhibit does not apply to it,
so it will turn downwind as readily as up.
If your Evolution tacks the wrong way
There was a bug in the EV-2 heading sensor that tacked in the wrong direction,
fixed in sensor software v3.13 (December 2022). Update the sensor rather than the
control head, and bring the ACU and head up to date at the same time.
If the tack buttons do nothing at all, that is intended: on LightHouse 4 they are
disabled when you are not sailing upwind.
You can keep an older head on an Evolution pilot. Raymarine lists the
ST70 Pilot Head and ST70+ Pilot as usable control
displays, with limitations: a compass restart is available via Swing
Compass but not Lock Compass, and response shows as 1, 2
and 3 rather than Leisure, Cruising and Performance.
ST4000+ and ST5000+
These are adjustable, with the same 40° to 125° range in 1°
steps and the same 100° default — but the setting is in
Dealer setup rather than User setup, and getting in takes a
considerably longer press than you would expect.
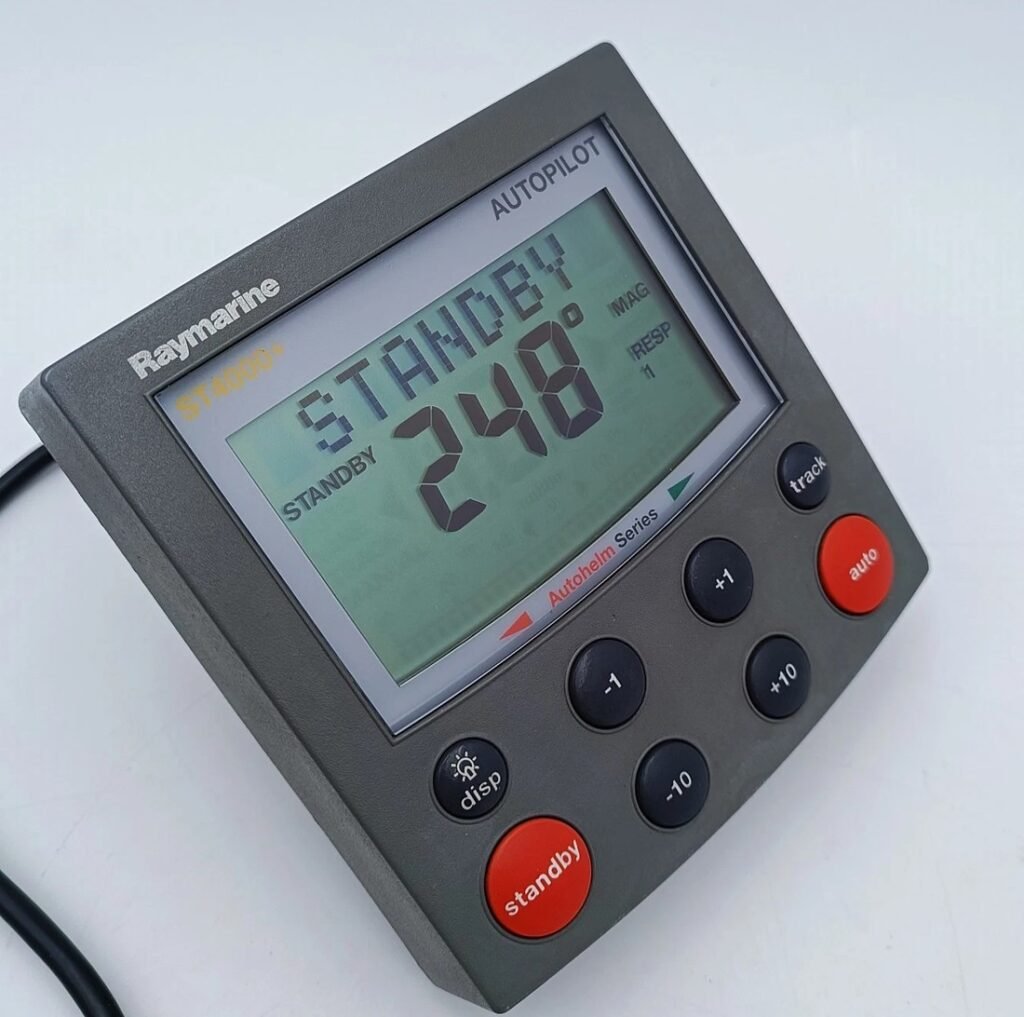 An ST4000+ in Standby, which is where you have to be before you start. Everything below is done with these keys: standby bottom left, disp beside it, and -1, +1, -10 and +10 on the right.
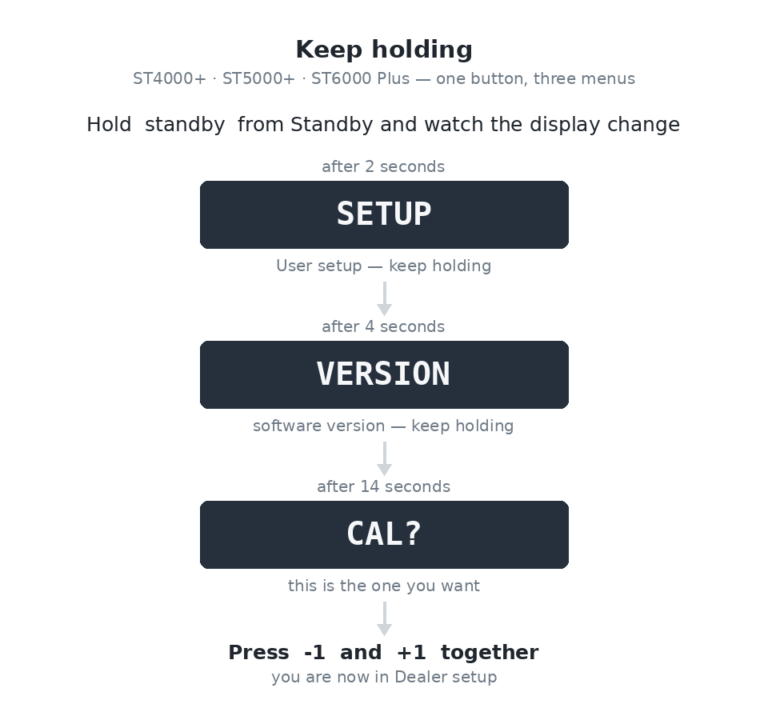
- From Standby, press and hold standby for 14
seconds. Keep holding past the other menus on the way — 2 seconds gives
you SETUP (User setup) and 4 seconds gives you
VERSION. Let go when the display reads CAL? - Press -1 and +1 together.
You are now in Dealer setup, on the first screen: CAL LOCK OFF. - Press disp repeatedly to step through to
AUTO TACK. It is the ninth screen, immediately after
OFF COURSE. - Adjust with -1 and +1.
- Hold standby for 2 seconds to quit. Settings
are saved on exit.
If you cannot get past CAL LOCK, the calibration lock is on —
it is the first screen in that same Dealer setup cycle, so turn it off there.
Worth knowing: there is no gybe inhibit on these units. It
arrived with the SmartPilot generation. On an ST4000+ or ST5000+, AutoTack will
turn the boat whichever way you ask it to, including downwind through a gybe.
The original ST4000 is different
The non-Plus ST4000 Tiller Drive has no adjustable tack angle —
its handbook says it “will turn the vessel through 100°”, and that is that. Its
calibration uses numbered levels 1 to 13, the same scheme as the tiller pilots
below, and none of them is a tack angle. Entry is a 5-second hold of
standby, auto cycles the levels,
-1 and +1 adjust, and a 1-second hold of
standby saves on the way out — a momentary press exits without
saving.
ST1000, ST2000, ST1000+ and ST2000+ tiller pilots
These do have a calibration menu, reached entirely through button presses on the
unit itself — but there is no tack angle in it. AutoTack on a tiller pilot is a
fixed 100° turn, available in Auto, Track and WindTrim modes.
The + makes no difference here. The non-Plus ST1000 and ST2000
have the same built-in automatic tack facility, turning the vessel through 100° in
the required direction, in compass and vane modes. Same buttons, same fixed angle,
same absence of a setting.
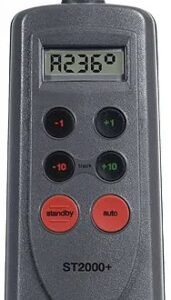
To get into calibration:
- Hold standby for 5 seconds. The display shows
CAL. - Repeat that keypress within 10 seconds — hold
standby for 5 seconds again. You are now in calibration, showing
level 1 and its value. - Press auto to step through the levels.
- Use -1 and +1 to change a
value. - Hold standby for 1 second to quit and save. A
momentary press of standby quits without saving.
The levels available, with their defaults:
- 1 — Rudder gain (default 5)
- 5 — Average cruise speed (default 8)
- 6 — Off course alarm angle (default 20)
- 9 — Local magnetic variation (default off)
- 10 — Northerly/Southerly turning error correction (default off)
- 11 — Boat’s current latitude (default 0, and skipped if level
10 is set to 0) - 13 — Rudder damping (default 3)
Levels 2, 3, 4, 7, 8 and 12 are not used on these units. On the non-Plus ST1000
and ST2000, level 13 is missing too — rudder damping arrived with the Plus. If the
display shows
CAL OFF when you try to get in, calibration access has been locked
— hold -1 and standby together for 10 seconds to
toggle it back on.
Kit with no AutoTack at all
Some Raymarine and Autohelm units simply do not have the feature, so there is no
setting to hunt for. If you have one of these, that is the answer:
- RayPilot 650 — it is a control head, and it does have Wind
Vane mode (auto and stby together), but there is
no tack function. It has six keys and a rotary course-change knob rather than the
-1/+1/-10/+10 keys that trigger an AutoTack, and neither its Type
100/300 nor its Type 150/400 calibration list contains a tack angle. It does have a
calibration menu — hold stby for 16 seconds, then press
auto and stby together — but the tack is not in
it. - Autohelm SportPilot and SportPilot Plus — a self-contained
wheel-drive pilot for powerboats. It has no display and no menu system at all: a
rotary switch for Standby and five gain settings, ±1° switches on the stalk, and a
Nav function. No wind mode, no tack. The only calibration is compass
linearisation. - S1000 — a powerboat course computer sold as a package with a
pump and the S100 wireless handset. Its modes are Auto and Track, plus the fishing
patterns (zigzag, circle, clover). No tack. - ST5000 without the “Plus” — see below, this one is worth
explaining properly.
The non-Plus ST5000 is a powerboat pilot
This one causes real confusion, because the ST5000+ is a sailing pilot with a
fully adjustable tack angle and you would reasonably assume the plain ST5000 is the
same thing, one generation earlier. It is not.
The non-Plus ST5000 was sold only in Hydraulic and
Sterndrive variants, both for powerboats — its handbook describes
it as a permanently installed autopilot for hydraulically steered power boats. There
is no AutoTack entry in the contents, no tack key
combination, no tack level in calibration and no index entry. The feature is not
fixed at some value — it is simply absent. AutoTack arrives on the ST5000 line only
with the ST5000+ SailPilot.
So on the ST4000 the + decides whether the angle is
adjustable; on the ST5000 it decides whether the feature exists;
and on the ST1000 and ST2000 it changes nothing at all. Three different meanings for
the same suffix, which is why so much of the advice online is contradictory.
For the record, the non-Plus ST5000 does have a calibration menu — numbered
levels 1 to 13, entered by holding standby for 5 seconds, stepped
with auto, adjusted with -1 and
+1, saved by holding standby for 1 second, with a
momentary press exiting without saving. None of the levels is a tack angle.
One naming trap here. The S1000+ and S2000+
are an entirely different thing from the S1000 — they are a rebadge of the ST1000+
and ST2000+ tiller pilots, to the point that the running headers inside the 2013
manual still read “ST1000 Plus & ST2000 Plus”. So they behave exactly as the
tiller pilots described above: AutoTack fixed at 100°, no setting.
Doing it without the two-key press
All of that assumes you are stood at the pedestal with a hand free. Pressing two
buttons at once is awkward at the best of times, and worse at the moment you
actually want to tack.
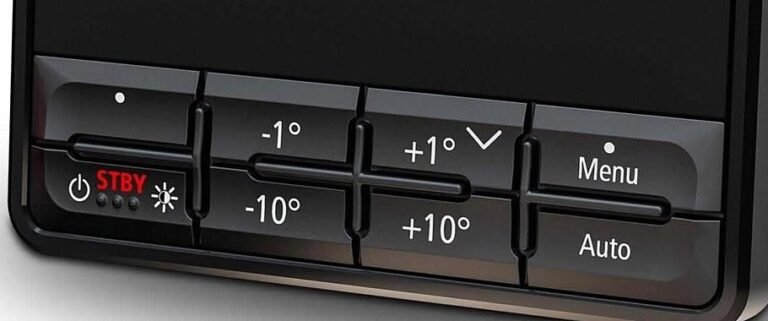
This is one of the things our own controller is for. It sends the tack straight
to the autopilot, so you can put it on a button and take it with you — from the
phone or tablet app, a watch, a wireless remote on a bulkhead, or the controller’s
own web page. The two actions are called Port Tack and
Starboard Tack, and they work the same way across all the Raymarine
pilots we support, old and new.
Three things worth knowing before you put a tack on a button:
- Every tack asks first. A confirmation appears, and clears
itself after about ten seconds if you do not answer, so a stray press cannot round
you up. - Remote buttons need a two-second hold, deliberately, for the
same reason. - Autopilot Lock blocks it. With the lock on, only man overboard
and the lock release get through.
What it does not do is change how far the boat turns. It asks the pilot to tack;
the pilot turns through whatever angle it is set to — or, on an Evolution, the
mirror of your wind angle. Putting the tack on a button changes who has to be at the
pedestal, not what the pilot does when it gets there.
Menus shift between software versions, so check your own manual before changing
calibration settings. If your system is not covered above, or yours behaves
differently, get in touch and we will add it.


Leave a Reply
You must be logged in to post a comment.